
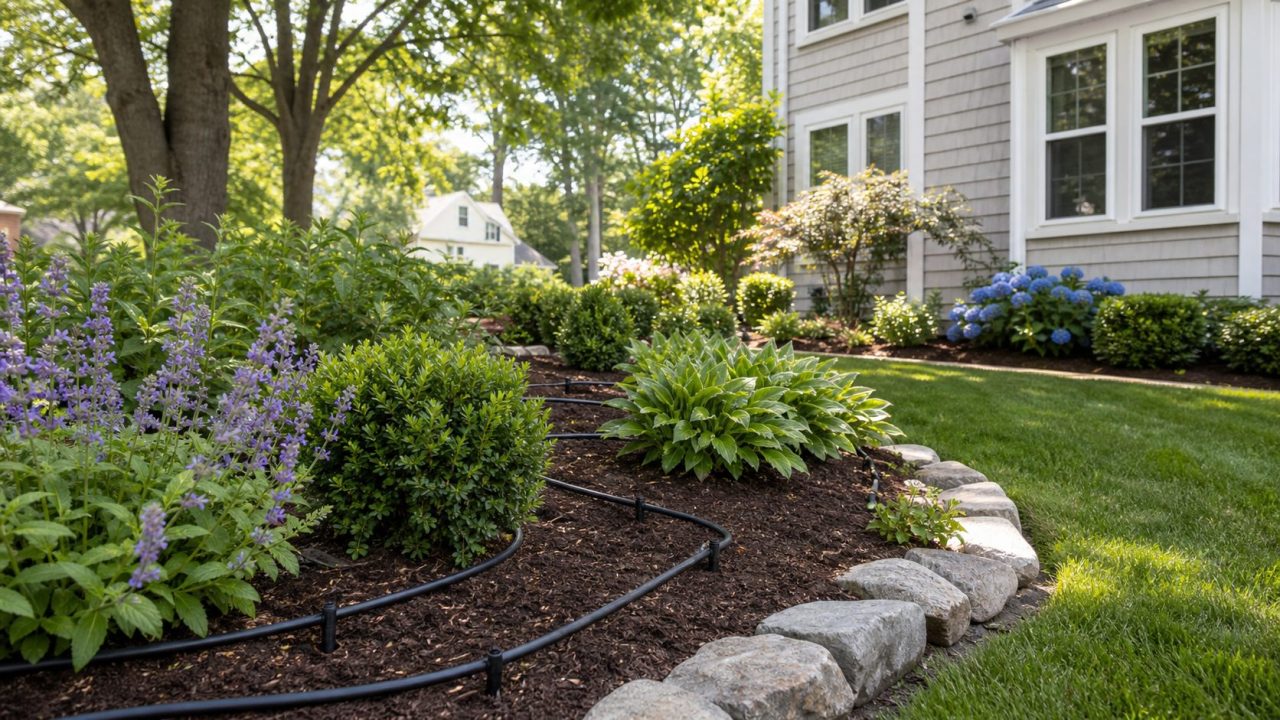
Is Installing a Drip Irrigation System Worth It? (Yes — Here’s How It Works)
Installing a drip irrigation system is one of the most effective upgrades you can make to your garden. Here’s a quick overview of the process before we dive into the details:
- Plan your layout — sketch your garden, group plants by water needs, and identify your water source
- Gather components — backflow preventer, pressure regulator, filter, mainline tubing, and emitters
- Assemble the head unit — connect components to your outdoor spigot in the correct order
- Lay out the mainline tubing — run it along your garden beds and secure with stakes
- Install emitters — punch holes and attach the right emitters for each plant type
- Flush and test — run the system, check for leaks, then cap the ends
- Add a timer — automate your watering schedule for hands-free efficiency
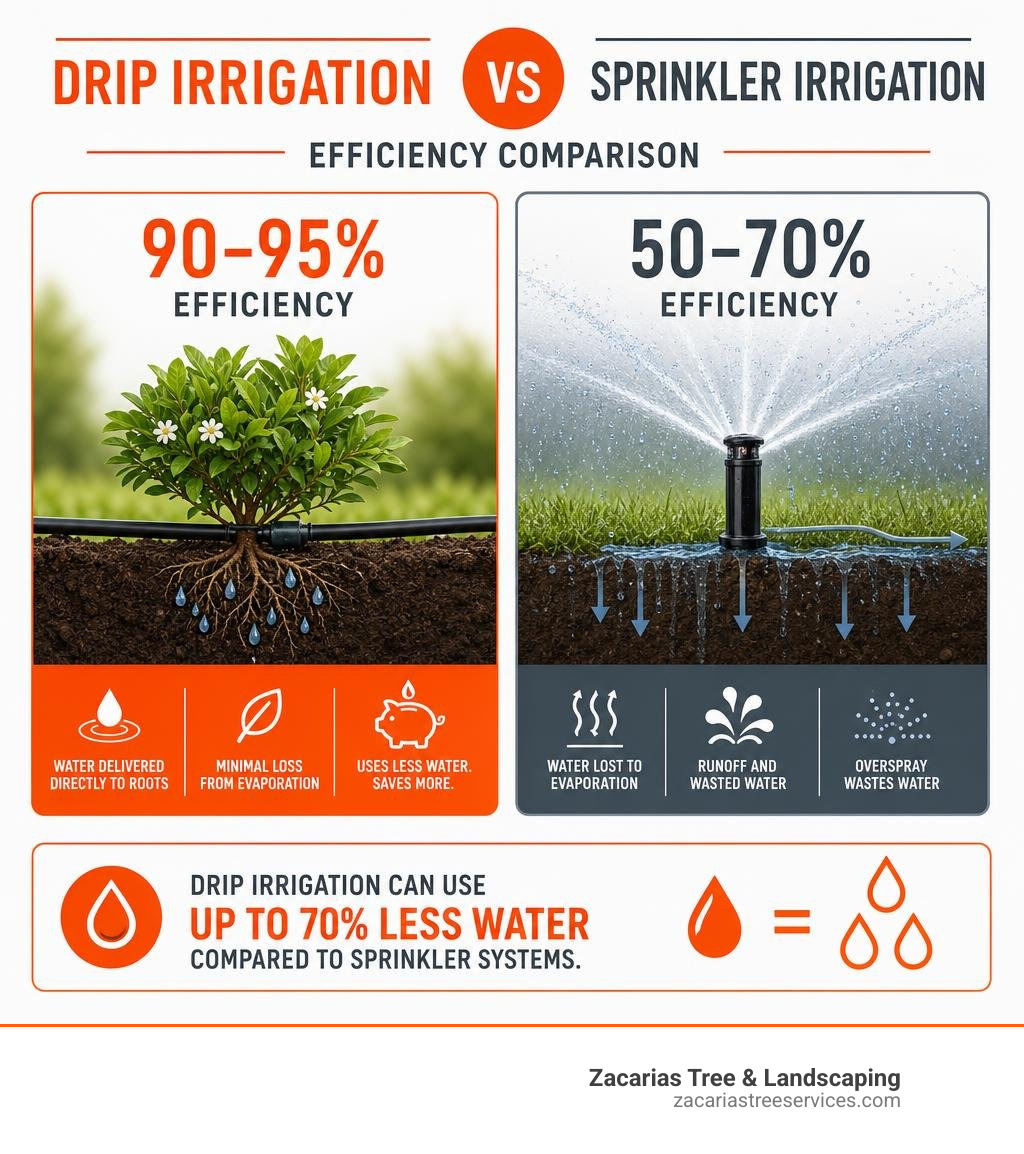
Traditional sprinklers operate at just 50–70% efficiency — meaning up to half your water is lost to evaporation, runoff, and overspray. Drip irrigation systems, by contrast, operate at 90–95% efficiency by delivering water slowly and directly to each plant’s root zone. That difference can cut your water bills by as much as 70%.
The good news? A basic DIY system is more straightforward than it looks. Most homeowners can set up a simple setup in a single afternoon with no special plumbing experience required.
That said, larger or more complex layouts — especially those involving mature trees, slopes, or multiple zones — benefit from professional planning and installation.
Easy installing a drip irrigation system word list:
Why Choose Drip Irrigation Over Traditional Sprinklers?
When you water your garden with traditional overhead sprinklers, a significant portion of that water never actually reaches the soil. Instead, it drifts away in the wind, pools on your walkways, or evaporates in the summer heat. In fact, landscape irrigation can account for up to 60% of household water use, and homeowners frequently apply double the amount of water their plants actually need.
Drip irrigation solves this problem by delivering water slowly and directly to the plant’s root zone. This slow-release method allows even dense clay or dry sandy soils time to absorb water that would otherwise run off. Because you are only wetting the soil directly around your target plants, you also significantly reduce weed growth. Weed seeds in the dry, unwatered spaces between your plants simply won’t get the moisture they need to germinate.
Additionally, keeping water off your plants’ foliage prevents the damp conditions that invite fungal diseases. Whether you are managing delicate flower beds, a vegetable garden, or looking to integrate a system with an existing in ground irrigation system, drip technology is the most water-wise choice available in 2026.
Planning and Designing a Drip Irrigation System
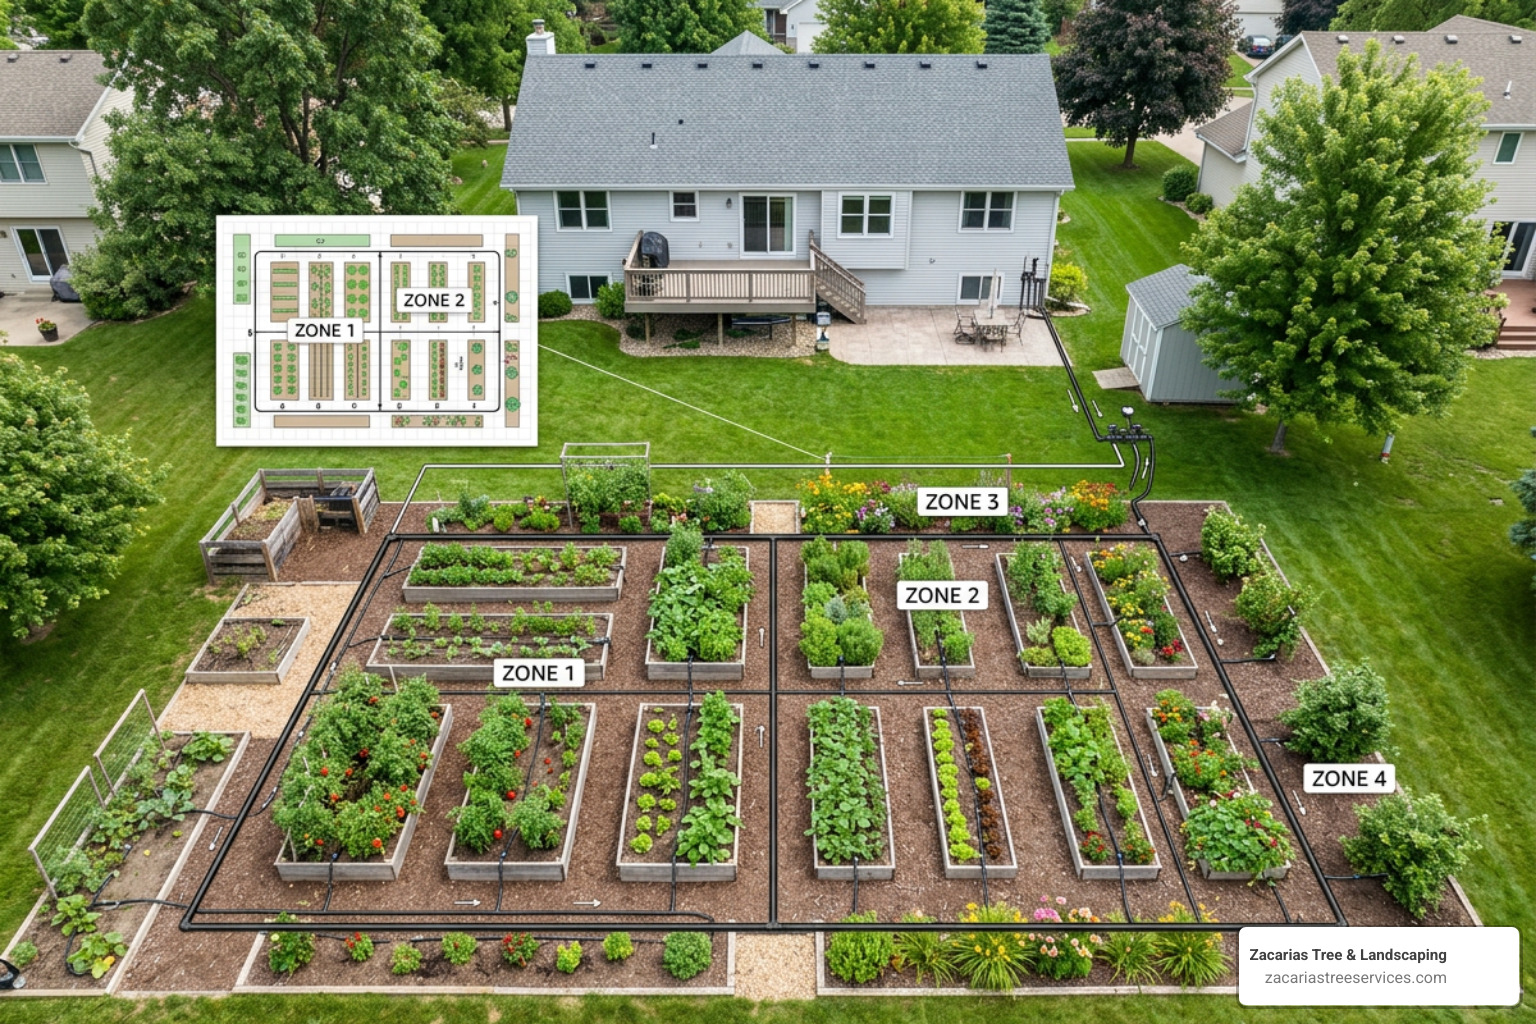
Before you buy a single piece of tubing, you need a plan. Designing a system without a map often leads to uneven water pressure, underwatered plants, and unnecessary trips to the hardware store.
Essential Components for Installing a Drip Irrigation System
To build a reliable system, you need to understand the anatomy of a drip setup. Every functional drip system relies on a specific set of components to control water pressure, keep the lines clean, and deliver the right amount of moisture:
- Backflow Preventer: This is a safety device required by most local codes in Massachusetts. It prevents non-potable irrigation water from siphoning back into your home’s clean drinking water supply.
- Mesh Filter: Drip emitters have tiny openings that clog easily. A 150-to-200 mesh filter catches sediment and mineral debris before it enters your lines.
- Pressure Regulator: Municipal water pressure in the Greater Boston area usually ranges from 40 to 80 PSI. However, drip systems function best at a low pressure of 15 to 30 PSI. A regulator prevents your fittings from popping off and your emitters from bursting.
- Mainline Tubing: This is typically 1/2-inch polyethylene (PE) tubing that acts as the primary highway carrying water from your source to your garden beds.
- Microtubing (Distribution Lines): This smaller 1/4-inch tubing branches off the mainline to deliver water directly to individual plants.
- Emitters: These small devices attach to the tubing and regulate how fast water drips out, measured in Gallons Per Hour (GPH).
For a deeper dive into selecting specific parts and kits, you can consult the Raindrip Installation Guide.
Designing and Mapping Your Garden Layout
Grab a piece of graph paper and sketch out your yard. Mark the location of your outdoor water spigot, your garden beds, individual shrubs, and any trees.
As you map out your design, practice hydrozoning—the method of grouping plants with similar water requirements together on the same watering line. For example, your thirsty vegetable beds should be on a different zone than your drought-tolerant shrubs.
You also need to calculate your water source’s flow capacity. To do this, place a 5-gallon bucket under your outdoor faucet, turn it on fully, and time how long it takes to fill. You can calculate your Gallons Per Minute (GPM) with this simple formula:
(Bucket Size in Gallons / Time to Fill in Seconds) x 60 = Flow Rate in GPM
Multiply your GPM by 60 to find your total Gallons Per Hour (GPH) capacity. When planning your system, the combined GPH rating of all your emitters on a single line must not exceed 75% of your faucet’s total GPH capacity.
If you are planning a system that spans a large property, deals with steep slopes, or needs to irrigate delicate ornamental trees, we highly recommend consulting a professional. For those looking to keep their trees healthy, checking out our guide on the best drip irrigation for trees can help you select the ideal setup.
How to Assemble and Lay Out Your System
Once your planning is complete and your parts are gathered, it is time to assemble the system.
Key Steps for Installing a Drip Irrigation System Safely
Assembling your system in the correct sequence is critical. If you place your pressure regulator before your filter, or omit a backflow preventer, the system will eventually fail or violate local plumbing codes.
Follow this exact sequence to build your “head unit” at the outdoor faucet:
- Thread the Backflow Preventer directly onto your outdoor spigot. Hand-tighten it, then give it a quarter-turn with pliers.
- Attach the Irrigation Timer (if you are automating your system).
- Install the Mesh Filter below the timer to catch debris.
- Connect the Pressure Regulator to bring the water pressure down to a safe 20–25 PSI.
- Attach the Tubing Adapter, which transitions the threaded metal or plastic head unit to your 1/2-inch polyethylene mainline tubing.
Once your head unit is assembled, lay your 1/2-inch mainline tubing out in the sun for 15 to 20 minutes. This makes the plastic highly pliable and much easier to unroll and connect.
Run the mainline along the perimeter of your garden beds. Secure the tubing to the ground every 3 to 5 feet using metal landscape stakes to prevent it from shifting. When laying out your mainline, remember this golden rule: do not run half-inch tubing more than 200 feet on a single zone, or you will experience a severe drop in water pressure at the end of the line.
For step-by-step visual guidance on connecting fittings, you can refer to the Step By Step Drip Irrigation System Installation Guide. If you are running lines near valuable landscaping trees, read our guide on setting up a drip system for trees to avoid damaging sensitive root structures during installation.
Selecting Emitters and Tubing Based on Soil Type
The type of soil in your Massachusetts yard dictates how water moves once it leaves your emitters. Clay soil, common in parts of Middlesex County, absorbs water very slowly and spreads it outward. Sandy soil, which you might find closer to coastal Essex County, drains rapidly and pulls water straight down like a funnel.
| Soil Type | Water Behavior | Recommended Emitter Flow Rate | Recommended Emitter Spacing |
|---|---|---|---|
| Clay | Absorbs slowly, spreads horizontally | 0.5 to 1.0 GPH | 18 to 24 inches |
| Loam | Ideal absorption and even spread | 1.0 GPH | 16 to 18 inches |
| Sandy | Drains rapidly, pulls straight down | 2.0 to 4.0 GPH | 10 to 12 inches |
Always use pressure-compensating (PC) emitters. These devices ensure that every plant receives the exact same amount of water, whether it is at the very beginning of the mainline or 150 feet down the line on a slope.
When running microtubing from your mainline to individual potted plants or shrubs, run microtubing no longer than 15 feet, and always attach an emitter to the very end of the microtubing to regulate the flow.
System Testing, Maintenance, and Automation
Before you bury your lines under a beautiful layer of mulch, you must thoroughly test the system.
Leave the ends of your 1/2-inch mainline tubing open and turn on the water for 30 to 60 seconds. This flushing process is vital because it clears out any plastic shavings, dirt, or debris that entered the lines during installation. Once the water runs completely clear, turn off the tap and seal the ends of your mainline using figure-8 end caps.
Turn the system back on and inspect every emitter. Look for steady dripping and check all your elbow and tee connectors for leaks. If you accidentally punched a hole in the wrong spot, don’t panic—simply pop a plastic “goof plug” into the hole to seal it.
To keep your system running beautifully season after season:
- Clean the filter monthly during the spring and summer. Unscrew the filter cap, flush the mesh screen with clean water, and replace it.
- Winterize your system. Massachusetts winters are harsh. Before the first hard freeze in Essex or Middlesex County, turn off the main water valve, disconnect your head unit (timer, regulator, and filter) and store it indoors. Use an air compressor to blow any remaining water out of the poly lines, or open your end caps to let the system drain completely so freezing water doesn’t split your tubing.
- Automate with smart controllers. Upgrading to a smart, weather-based timer allows your system to automatically skip watering days when we get heavy New England rainstorms, saving you water and protecting your plants from root rot.
If managing seasonal maintenance or configuring complex zones sounds overwhelming, our team can help. Learn more about our professional Irrigation Systems and Landscaping Services to keep your property looking its best year-round.
Frequently Asked Questions About Drip Irrigation
How long can you run half-inch tubing without losing pressure?
You should never run a single continuous line of 1/2-inch polyethylene tubing longer than 200 feet. If your run exceeds this length, the friction of the water moving through the pipe will cause a significant drop in pressure, and the emitters at the far end of your system will barely drip, if they flow at all. If your garden beds are further than 200 feet from your water source, you will need to split your system into multiple independent watering zones.
How much does it cost to install a drip irrigation system?
Based on general internet research and national averages, a basic DIY drip irrigation system for a small garden bed typically costs between $150 and $1,500 for materials, depending on the size of your yard, your soil type, and the complexity of your design.
Please note that professional installation costs vary widely depending on your specific property conditions, access, and the scope of the project. At Zacarias Tree & Landscaping, we customize every system to fit your unique landscape. We encourage you to contact us for a free, on-site estimate to get an accurate, personalized price for your home.
Can you use drip irrigation for mature trees?
Yes, but you must design the system to match the tree’s root system. Mature trees have roots that extend far beyond their trunk. To water a mature tree effectively, do not place emitters right next to the trunk. Instead, loop your drip line around the tree at its dripline—the outer edge of the tree’s canopy where rainwater naturally drips off the leaves. For established trees, you want to use multiple emitters to wet 50% to 75% of the soil area directly under the canopy.
Conclusion
Installing a drip irrigation system is an investment that pays off in healthier plants, lower water bills, and hours of saved time. While a small, single-bed DIY project is a great weekend task, larger landscapes, multi-zoned yards, and properties with mature trees require a professional touch to ensure even pressure and optimal plant health.
At Zacarias Tree & Landscaping, we provide rapid response, quick estimates, and thorough cleanups for homeowners throughout Essex County, Middlesex County, and the Greater Boston area—including Acton, Andover, Concord, and surrounding towns. Let us handle the design, trenching, and calibration of your system so you can sit back and enjoy a lush, thriving landscape.
Ready to upgrade your garden’s watering system? Contact us today to Get a Professional Irrigation Estimate.