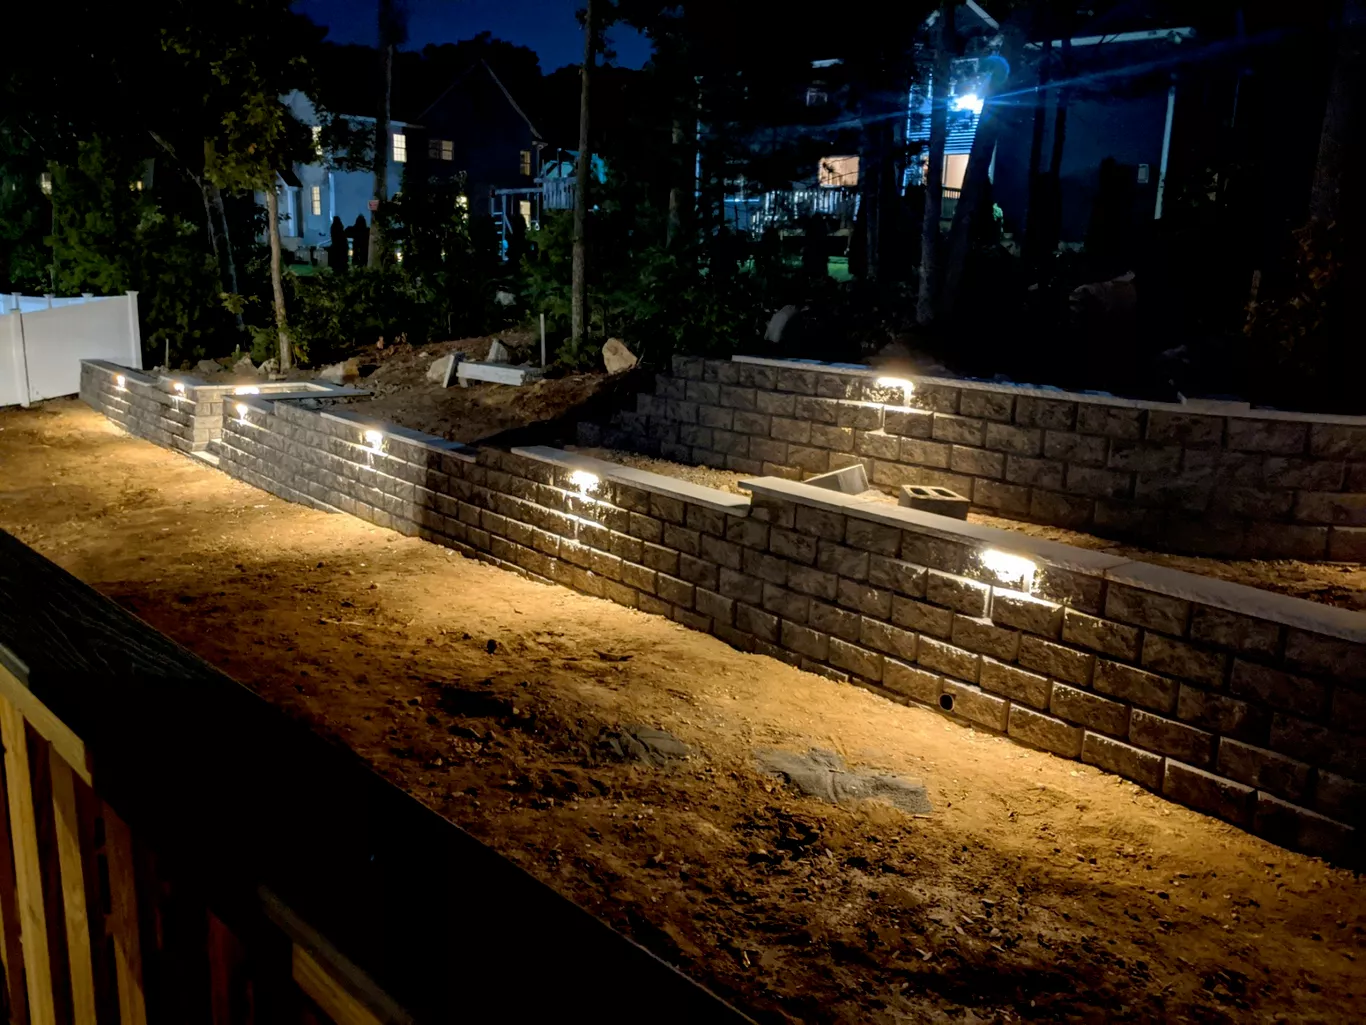
The safest, best-looking outdoor lighting plans start with two decisions: where people actually walk after dark, and how you’ll control glare. These low voltage landscape lighting tips focus on practical placement, fixture choice, and wiring basics so your walkways, patio edges, and front entry feel clear and comfortable—without turning your yard into a runway.
If you’re sketching a DIY layout or want to sanity-check an existing system that keeps failing, use the checklist below to avoid the most common problems: dim pools of light, tripping hazards, and fixtures that quit after the first season.
Most “it’s still too dark” complaints come from planning issues, not a lack of fixtures. The goal isn’t maximum brightness—it’s consistent visibility on the walking surface, with gentle guidance at turns, steps, and transitions.
Here are the most common causes we see when homeowners ask for low voltage landscape lighting tips after a frustrating install:
One more issue: mixing fixture types without a plan. For example, using only uplights for trees might look dramatic, but it won’t make a path safer. The best low voltage landscape lighting tips treat “safety lighting” (paths/steps) and “accent lighting” (trees/walls) as two layers that work together.

Think of your lighting plan as a route map: driveway to door, door to patio, patio to grill, and any steps in between. Start with safety, then add accents.
Use these low voltage landscape lighting tips as a layout checklist before you buy fixtures:
Wiring and power planning (where many DIY installs go sideways):
For a quick sanity check on safety and glare, compare your plan to the principles in the International Dark-Sky Association guidance—especially shielding and directing light only where it’s needed. These low voltage landscape lighting tips will keep your paths visible while minimizing light spill into windows and neighboring yards.
If you want a second set of eyes on your layout before you commit to parts, we’re happy to review a sketch and talk through fixture placement and cable routing.

Some projects are perfect for DIY, but others are worth professional help—especially when safety, reliability, and clean installation matter more than experimenting. If you’re dealing with multiple circuits, long runs, hardscape integration, or frequent failures, professional planning can prevent repeat work.
Consider calling a pro if any of these apply:
Zacarias Tree and Landscaping, Inc. installs and services outdoor lighting with a licensed-and-insured, safety-first approach. Our crew is experienced working around established landscapes and hardscape features, and we plan cable routes to reduce future damage from edging, aeration, and seasonal maintenance. We also use professional-grade tools for trenching, clean wire management, and secure, weather-resistant connections so the system holds up through real outdoor conditions.
If you’d like us to design or correct a system based on these low voltage landscape lighting tips, you can request an on-site estimate here: schedule a lighting consult.
Lighting performs best when the surrounding surfaces and drainage are stable. Wobbly pavers, heaving steps, or pooling water can shift fixtures, bury lenses, and shorten the life of connections.
If you’re planning improvements alongside these low voltage landscape lighting tips, these pages can help you coordinate the work:
When these elements are planned together, you get a cleaner look and fewer callbacks: lights stay aligned, beams stay unobstructed, and your paths and entryways remain predictable in every season.
Spacing depends on fixture output, beam spread, and where the light lands, but the goal is consistent visibility without bright hotspots. A good approach is to mock it up at night with temporary placement and adjust until shadows on the walking surface are minimized. Staggering fixtures on alternating sides often looks more natural than a straight line.
Prioritize lighting the tread surface and the leading edge so each step is easy to read. Step lights or shielded downlights usually work better than bright fixtures at eye level, which can cause glare and hide the step edge in shadow. If there’s any drop-off or uneven grade, add gentle perimeter lighting for orientation.
That’s commonly caused by voltage drop from long cable runs, too many fixtures on one line, or wire that’s too small for the distance. Splitting the layout into multiple runs, using a hub/loop design, or upgrading wire gauge can help. A transformer that’s near its limit can also contribute to inconsistent brightness.
In most yards, burying or properly concealing cable is the best way to protect it from mowers, edging, foot traffic, and weather. Even when shallow burial is used, you still need to avoid utilities and plan routes that won’t be disturbed by future planting or hardscape work. If you’re unsure where lines run, have utilities marked before you dig.
Warm white lighting is usually the most comfortable for gathering spaces and front entries because it feels inviting and reduces harsh glare. Cooler temperatures can look brighter but may feel stark and can emphasize shadows on textured surfaces. Consistency matters—mixing very warm and very cool fixtures can make a space look uneven.
You can add fixtures later, but planning ahead makes it easier and more reliable. Leaving transformer capacity, choosing a wiring layout that supports additional branches, and placing extra conduit or slack in key areas can prevent re-trenching. If you expect to expand, it’s worth building that flexibility into the initial design.
Need a pro? Zacarias Tree & Landscaping provides licensed, insured, and expert care across Lynn, Essex, and Middlesex Counties.
We live by a simple promise: Clear scope. Clear plan. Clean finish.
From emergency removals to seasonal landscaping, we’ve been Lynn’s trusted choice since 2002. Safety-first standards. Total site cleanup. Every time.